• Home
  • Suggest A DIY
  • DIY Newsletter

Knitting

Free Patterns, Tutorials and Project Ideas

  • About CraftGossip
  • Our Network
    • Bath & Body Crafts
    • Candle Making Ideas
    • Crochet Ideas
    • Cross Stitch
    • Edible Crafts
    • Felting Patterns
    • Glass Art
    • Home & Garden Ideas
    • Indie Crafts
    • Jewelry Making
    • Kids Crafts
    • Knitting Patterns
    • Lesson Plans
    • Needlework
    • Party Ideas
    • Polymer Clay
    • Quilting Ideas
    • Recycled Crafts
    • Scrapbooking
    • Sewing Patterns
    • Card Making
    • DIY Weddings
    • Not Craft Ideas
  • Giveaways
  • Roundups
  • Store
  • Search

Giveaway: DIY Holiday Magazine

November 17, 2014 by Sarah White

Win a copy of DIY Holiday magazine from Interweave/F+W.

Congratulations to Deanna, Maureen and Mary.

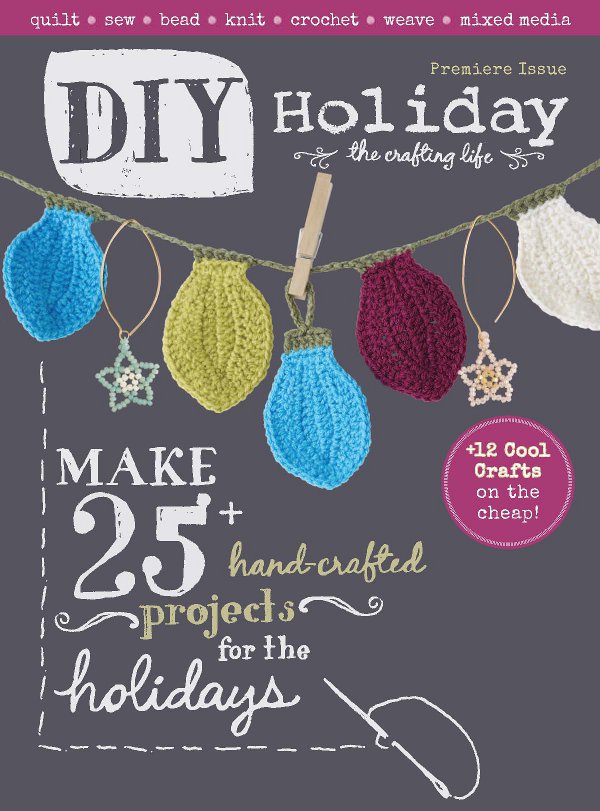
If you’re a multi-crafter who likes to give handmade and/or decorate your home with handmade things, you need to check out DIY Holiday 2014: The Crafting Life, a new crafty magazine from Interweave/F+W.

The magazine is 100 pages long and is chock-full of patterns and inspiration that you can quilt, sew, bead, knit, crochet and weave, as well as mixed media projects.

In the knitting realm you’ll find a cool woven heart ornament by Ann McDonald Kelly, Cathy Carron’s garter stitch mug cozies, a two-color snowflake cowl by Celeste Young and Andrea Babb’s unisex Walker Scarf, which features twisted rib and little trails of cables at the ends.

Other projects I like include a biased granny square crocheted pillow by Vickie Howell, the lovely, easy and ever-so useful quilted trivets by Debbie Bento and Susan Haynes Opdhal’s lovely embroidered Shisha Ornaments. The resin bangles by Heidi Boyd, which allow you to show off a little of your passion on your wrist, are simply amazing, too.

The magazine retails for $9.99 and is available online at the above link (paper or digital), but I’m giving you a chance to win one of three copies this week.

If you’d like one, leave a comment on this post before the end of the day Sunday, November 23. I’d love to hear what kind of crafts you’re working on for the holidays, whether for yourself, your home or to give as a gift. I have three of the six cowls I need to make done, and I’m taking a break from them with some super simple all stockinette arm warmers that are just for me.

Thanks for visiting, commenting, and sharing, and good luck!

Next Pattern:

  • A Holiday Sweater That's Not Too Holiday
  • DIY Nylon Net Scrubbing Pads – A Handy Kitchen Essential
  • Pom Pom Magazine to Cease Publication
«
»

Comments

  1. Alvina says

    November 18, 2014 at 7:50 am

    Working on infinity scarfs, both sewing & crocheting! Making purses and quilting several pieces! I enjoy many different crafts!

  2. Royce says

    November 18, 2014 at 8:43 am

    I am doing a lot of crocheting and teaching someone to crochet

  3. Mary Mac says

    November 18, 2014 at 8:43 am

    I am cross stitching Christmas tree ornaments right now.

  4. Donna says

    November 18, 2014 at 9:22 am

    Right now I’m setting up my “new” craft room so that I can delve into projects I’ve been saving up to do in my new space!

  5. Sarah says

    November 18, 2014 at 10:04 am

    I am making lots and lots of Christmas gifts! Just finished placemats, working on mug rugs, a baby blanket, pot holders, doll clothes and a soft game board. Oh, and Christmas stockings!

  6. Julie says

    November 18, 2014 at 10:49 am

    Hi,
    I mostly quilt but can crochet too!! Thanks for the chance to win:)

  7. Diana T. says

    November 18, 2014 at 12:34 pm

    I’m crocheting Christmas themed Amigurumis and knitting a shawl, mitts, and cardigan.

  8. kim says

    November 18, 2014 at 1:17 pm

    I have been cowl making like crazy.

  9. Kim says

    November 18, 2014 at 2:29 pm

    I love to knit and crochet and am gearing up for the frenzy of pre-holiday gift making. Thanks for the chance!

  10. Jackie says

    November 18, 2014 at 2:54 pm

    I am working on an apron, table runner, and jewelry rolls.

  11. sandra ealy says

    November 18, 2014 at 5:39 pm

    i started a knitting group last month and everyone is working hard making gifts for the holiday.

  12. yolanda v says

    November 18, 2014 at 6:41 pm

    I have bee working on a blanket, cowls and wrist warmers.

  13. kim salsman says

    November 18, 2014 at 9:24 pm

    Completinga few more fabric scissors sheaths
    And finish the baby blanket this weekend. Then on to the baby dolls!

  14. duchick says

    November 18, 2014 at 10:08 pm

    I am currently working on a Christmas tree skirt for my son. It’s his second one since his ex-girlfriend walked off with the first one. I guess she liked it too!

  15. tamstercmt says

    November 18, 2014 at 10:12 pm

    I have several projects going at once: knitting a scarf, decoupage boxes and pincushions made with fabric my friend just loves.

  16. MelodyJ says

    November 19, 2014 at 2:43 am

    I’m knitting a hat for me. Also I’m crocheting heart shaped ornaments.

  17. Deanna says

    November 19, 2014 at 10:35 am

    Haven’t started anything for Christmas – have a wedding to make things for first!

  18. Marilyn Coombs says

    November 19, 2014 at 9:00 pm

    Hi! I make all my greeting cards, which keeps me busy. As well, this year, I am trying my hand at making penny rugs.

  19. Cindy S. says

    November 20, 2014 at 10:03 am

    I’m working on a sweater for myself and Christmas cards for friends and family.

  20. buntyw says

    November 20, 2014 at 12:34 pm

    I making aprons for my sisters!

  21. Robin Mc says

    November 20, 2014 at 12:53 pm

    I am trying to knit my husband a sweater for Christmas. This mag looks fabulous! Keeping my fingers crossed that I win a copy.

  22. Aliza Biorn says

    November 21, 2014 at 9:10 pm

    I am embroidering dish towels, making lavender sachets, and crocheting hats.

  23. Linda K says

    November 24, 2014 at 10:32 pm

    Making ornaments and crocheting gifts.

« Older Comments

Have you read?

How To Do Kitchener Stitch: A Beginner-Friendly Guide To Grafting Knitting Seamlessly

Kitchener stitch is one of those knitting techniques that feels a little bit mysterious until you finally sit down and do it. It is often used to close the toes of socks, but it is also a wonderfully neat way to join two sets of live stitches together without making a bulky seam.

If you have ever finished a beautiful sock and then paused at the toe because the pattern says “graft remaining stitches,” this is the tutorial you want to keep handy.

Kitchener stitch, also called grafting, creates a row of stitches between two pieces of knitting so the join looks almost invisible. Instead of binding off and sewing two edges together, you use a tapestry needle and yarn to form a new row of knitting between the live stitches.

It is one of the most useful finishing techniques for knitters, especially if you enjoy knitting socks, mittens, cowls, loop scarves, or garments where a smooth join matters.

You might also like this older CraftGossip post on grafting with Kitchener stitch, and if you want to go deeper into finishing techniques, this post on mastering grafting in knitting is another helpful read.

What Is Kitchener Stitch?

Kitchener stitch is a method of grafting two sets of live stitches together. The stitches stay on two needles, usually held parallel to each other, and you use a threaded tapestry needle to work through the stitches in a specific order.

When done well, the finished join looks like one continuous piece of knitting.

This is why Kitchener stitch is so popular for:

  • sock toes
  • mitten tips
  • shoulder joins
  • cowls
  • loop scarves
  • seamless tube projects
  • underarm stitches on some sweaters
  • small knitted bags and pouches

It is most commonly used on stockinette stitch, but grafting can also be adapted for other stitch patterns once you understand the basic idea.

Why Use Kitchener Stitch Instead Of Sewing A Seam?

The biggest benefit of Kitchener stitch is that it creates a smooth, almost invisible join. That matters most in places where you do not want a bulky seam, such as the toe of a sock.

A sewn seam across a sock toe can feel uncomfortable inside a shoe. Kitchener stitch avoids that by creating a flat, flexible finish.

It also gives knitted items a more polished look. If you are making gifts, charity knits, socks, or heirloom-style projects, learning this one technique can make your finished pieces look much neater.

For knitters who enjoy socks, you may also like this roundup of knitting patterns using sock yarn, especially if you have leftover yarn after finishing a pair.

Supplies You Need

To work Kitchener stitch, you will need:

  • two knitting needles holding live stitches
  • a tapestry needle or darning needle
  • yarn tail or matching yarn
  • scissors
  • good lighting
  • a little patience the first time

If you are working sock toes, most patterns will tell you how many stitches to leave on each needle before grafting.

As a general guide, leave a yarn tail at least three times the width of the stitches you are grafting. If you are unsure, leave a little extra. It is much easier to weave in a longer tail than to run out halfway across.

A blunt-tip tapestry needle is easier to control than a sharp sewing needle because it slides between yarn strands without splitting them as much. You can find tapestry needles, sock knitting tools, stitch markers, and finishing supplies through places such as Amazon, Mary Maxim, or your favorite local yarn store.

Before You Start: Set Up Your Stitches

For standard Kitchener stitch on stockinette:

Hold the two needles parallel, with the wrong sides of the knitting facing each other.

The right side of the knitting should be facing out.

The needle closest to you is the front needle.

The needle farther away from you is the back needle.

Thread your yarn tail onto a tapestry needle.

Try to keep the stitches sitting neatly on the needles and avoid twisting them before you begin.

The Kitchener Stitch Mantra

Many knitters remember Kitchener stitch with this little rhythm:

Front needle: knit off, purl on.
Back needle: purl off, knit on.

That means:

On the front needle, go into the first stitch knitwise and take it off. Then go into the next stitch purlwise and leave it on.

On the back needle, go into the first stitch purlwise and take it off. Then go into the next stitch knitwise and leave it on.

Once you get into the rhythm, it becomes much less intimidating.

Kitchener Stitch Step-By-Step

Setup Step 1

Insert the tapestry needle into the first stitch on the front needle as if to purl.

Pull the yarn through.

Leave the stitch on the knitting needle.

Setup Step 2

Insert the tapestry needle into the first stitch on the back needle as if to knit.

Pull the yarn through.

Leave the stitch on the knitting needle.

Now you are ready to begin the repeating sequence.

Step 1: Front Needle, Knitwise, Off

Insert the tapestry needle into the first stitch on the front needle as if to knit.

Pull the yarn through.

Slip that stitch off the knitting needle.

Step 2: Front Needle, Purlwise, On

Insert the tapestry needle into the next stitch on the front needle as if to purl.

Pull the yarn through.

Leave that stitch on the knitting needle.

Step 3: Back Needle, Purlwise, Off

Insert the tapestry needle into the first stitch on the back needle as if to purl.

Pull the yarn through.

Slip that stitch off the knitting needle.

Step 4: Back Needle, Knitwise, On

Insert the tapestry needle into the next stitch on the back needle as if to knit.

Pull the yarn through.

Leave that stitch on the knitting needle.

Repeat these four steps until all stitches have been grafted.

A Simple Way To Remember It

Say this out loud as you work:

Knit off, purl on.
Purl off, knit on.

It feels silly the first few times, but it works. Many knitters mutter this little phrase while closing sock toes, and honestly, anything that helps you avoid losing your place is worth doing.

How Tight Should Kitchener Stitch Be?

One of the most common mistakes with Kitchener stitch is pulling the yarn too tightly.

You are not sewing a seam closed. You are creating a new row of knitting.

After every few stitches, gently adjust the tension so the grafted row matches the surrounding stitches. If you pull too tightly, the join may pucker. If you leave it too loose, the grafted row may look stretched out.

A good trick is to look at the stitches beside the graft and try to match their size.

Do not panic if it looks a little uneven while it is still on the needles. Kitchener stitch often looks better once everything is off the needles and the tension has been gently adjusted.

How To Finish The Last Stitches

When you get to the final stitches, continue the sequence as closely as possible.

If there is only one stitch left on a needle, work the “off” part of the sequence for that stitch.

Pull the yarn through gently and then weave the tail into the inside or wrong side of the project.

For socks, weave the end into the inside of the toe so it will not be visible.

Troubleshooting Kitchener Stitch

My graft looks too tight

You probably pulled the yarn too firmly as you worked. Use the tip of your tapestry needle to gently loosen each grafted stitch, working from one side to the other.

My graft looks loose

Gently snug up the grafted stitches one at a time. Do not yank the working yarn all at once, as this can make one area tight and another loose.

I lost my place

Pause and look at the stitches. If the last stitch was removed from the front needle, you are probably ready to work the “purl on” part on the front needle or move to the back needle. If you are a beginner, it helps to say the mantra out loud every single time.

I split the yarn

A blunt tapestry needle helps prevent splitting. If a stitch looks split and messy, carefully undo that part before continuing.

The join looks like a seam, not a row of knitting

This usually means the tension is too tight or the needle was inserted in the wrong direction on some stitches. Practice on a swatch before using Kitchener stitch on a special project.

Practice Before Grafting A Real Project

If Kitchener stitch makes you nervous, knit two small stockinette swatches and place the live stitches on two needles. Use a contrasting yarn to practice grafting across the stitches.

Practicing with a different color makes it easier to see what the grafted row is doing. Once you understand the movement, try again with matching yarn.

This is especially useful before grafting handmade socks, because sock toes are small and can feel fiddly the first few times.

When Else Can You Use Kitchener Stitch?

Kitchener stitch is most famous for sock toes, but it is helpful in many other knitting projects.

Use it for joining the ends of a cowl or loop scarf, especially when you start with a provisional cast on. This CraftGossip post on making loop scarves from stash yarn mentions using a provisional cast on so the ends can be grafted together neatly.

You can also use Kitchener stitch for small bags, seamless headbands, mitten tips, and some garment joins.

If you are brushing up on knitting basics, this post on favorite ways to cast on is a good companion read, especially if you are learning how different beginnings and endings affect the finish of a project.

Kitchener Stitch For Sock Knitters

If you knit socks from the cuff down, Kitchener stitch is one of the most useful finishing techniques you can learn.

Most cuff-down sock patterns end with a small number of stitches divided between two needles. Kitchener stitch closes those stitches without creating a ridge across the toe.

For a comfortable sock toe:

Keep the stitches evenly divided.

Do not pull the graft too tightly.

Check that the toe lies flat before weaving in the end.

Use matching yarn whenever possible.

Once the sock is finished, blocking can also help smooth the stitches and even out the graft.

If you enjoy knitting small accessories, you might also like these easy headband knitting patterns, which are great projects for practicing finishing techniques on something smaller than a sweater.

Kitchener stitch has a reputation for being tricky, but it is really just a short sequence repeated across two needles. Once you remember the rhythm — knit off, purl on, purl off, knit on — it becomes much easier.

The real secret is to slow down, keep your tension relaxed, and remember that you are creating a row of knitting, not stitching a seam shut.

It may not feel natural the first time, but after a few sock toes or practice swatches, Kitchener stitch becomes one of those finishing skills you will be glad to have in your knitting toolkit.

Categories

baby hat Baby Patterns Beginner Book Reviews cardigan Christmas CraftGossip Giveaways Craft News and Events Free Knitting Patterns Giveaways! Hats Knitting Articles Of Interest Knitting Patterns Knitting Technique & Ideas mittens Quick scarf shawl patterns socks Sweaters

Featured Posts

to knit or not to knit

To Knit or Not to Knit; Is that a Question?

knit a super quick and easy hat for kids

Stitch a Simple Pom Pom Hat for Kids

lion brand vannas sequins

Lion Brand Yarns 20 Percent Off This Week

win a copy of pop knitting

Giveaway: Pop Knitting

knit a simple garter stitch headband.

Knit a Super-Simple Headband to Keep Your Ears Warm

RSS More Articles

  • Cross Stitch Ice Cream and Frozen Treats
  • 15 Charity Sewing Projects That Let You Sew Something Useful For A Good Cause
  • Sunflower Ribbon Embroidery Tutorials and Kits to Brighten Your Hoop
  • Decorating Mistakes That Make Your Living Room Feel Cluttered
  • Remembering Jill Smokler, Founder Of Scary Mommy
  • In the Garden Layer Cake – A Bloom-Filled Fabric Collection for Spring Sewing
  • How To Do Kitchener Stitch: A Beginner-Friendly Guide To Grafting Knitting Seamlessly
  • Pattern Review: Georgie Granny Square Bucket Hat Crochet Pattern
  • 12 Handmade Patriotic 4th of July Card Ideas
  • Shark Week Learning for Kids

Pick Your Blog

  • Sewing
  • Knitting
  • Quilting
  • Crochet
  • Home & Garden
  • Recycled Crafts
  • Scrapbooking
  • Card Making
  • Polymer Clay
  • Cross-Stitch
  • Edible Crafts
  • Felting
  • Glass Art
  • Indie Crafts
  • Kids Crafts
  • Jewelry Making
  • Lesson Plans
  • Needlework
  • Bath & Body
  • Party Ideas
  • Candle Making
  • DIY Weddings
  • Not Craft
  • Free Craft Projects

Copyright © 2026 · CraftGossip | Start Here | Contact Us | Link to Us | Your Editors | Privacy and affiliate policy