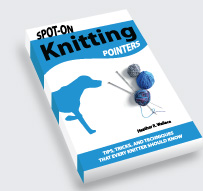
 Well, Heather Wallace has you covered! Grab ahold of this book as quick as you can and sit down for a good read. PACKED with awesome ideas, this 196 page book will have you wondering why you never thought of……
Yeah, I know! Right?
Click on this link for info on how you can get your Spot On Knitting Pointers Book!
Here are some examples:
Preventing Ribbing From Flipping
There’s nothing like the disappointment of finishing a sweater only to discover that the ribbing just won’t lay flat. Yes, it’s the dreaded flipping ribbing and it strikes without warning. What is a knitter to do? Well, the good news is that there are a few measures that you can take to prevent this troublesome problem from occurring. So, if flipping ribbing has been a problem for you, then here are some things that you can do to prevent it.
•If the pattern that you’re working calls for a very small amount of ribbing, then work extra rows until it measures between one and a half inches to two inches in length.
•Knit one purl one ribbing may be more prone to flipping than knit two purl two ribbing, so try switching over to knit two purl two ribbing instead.
•If you’re casting on loosely, then you might want to try knitting a row before you begin working in your ribbing pattern. This will add a small garter stitch border to your piece that will help to curb the curl.
•In this instance, a firm cast on edge may help, so instead of following the advice detailed in the Casting On and Binding Off Loosely pointer, you might want to, instead, cast on using a needle that’s one size smaller than the needles that you will be using when working your ribbing.
Putting Your Gauge Swatches to Good Use
Knitting a gauge swatch is a necessary part of any project. Sure, they serve their purpose, but, once your gauge is established, those little squares no longer have any use. That, however, doesn’t have to be the case because with a little creative thinking you can put your gauge swatches to some very good uses.
It may take you a while to accumulate enough gauge swatches, but, once you do, you can assemble them in to all sorts of things. You could sew them together to make a an afghan, a pillow, a rug, a scarf, a placemat, or a dish clothe.
If you decide that you would like to save your swatches for later use, then you will have to plan ahead. That means that you will need to do two things. First, be sure to knit your swatches so that they all measure exactly the same size. That way it will be possible for you to easily assemble them later on. Secondly, you should add a selvage to your swatches. That’s because a selvage will make your swatches less prone to rolling, which will mean that they should lay nice and flat once they’ve been assembled.
Blocking Made Easy
Blocking your knitted items doesn’t have to be a major undertaking. As a matter of fact, if your knitted item was made from a washable fiber, the blocking process can be completed quite easily using the method detailed within this pointer. Here’s what you need to do to have perfectly blocked knitting without a lot of effort.
First, plan to block your knitting on wash day. After washing a load of bath-size towels, remove a spun-out, damp towel from the washer and then smooth it out on a flat surface. Next, arrange each of your pieces of knitting on the towel. If your project includes several pieces, you may need to place some of them on additional towels. As you do this, be sure to smooth your knitted pieces out so that they’re lying flat. Now, roll up your towel(s). As you do, ensure that your pieces are still smooth and that they haven’t bunched up.
Wait several hours, or even overnight, before unrolling the towel(s). After unrolling, arrange the knitted pieces on a flat surface. Then, shape each piece until it reaches the measurement required by your pattern. Once you’ve gotten them shaped to the perfect size, pin each piece in place, so that this size is maintained. Now, just leave these pieces to dry completely. After they have dried, you will find that they have been perfectly blocked with a minimal amount of effort.
Using a Lifeline
Those who have only just begun knitting, and even advanced knitters, know all too well that mistakes happen. Mistakes that occur when knitting a simple project can be a bit annoying, but those that happen when knitting complicated designs are ten times worse. In either case you can easily use a lifeline as a safety net of sorts so that mistakes won’t be a problem.
Placing lifelines at regular intervals will mean that you can easily unravel back to a certain point in your project and begin your work from there, should you ever find the need.
To place a lifeline into your work, first select a suitable row. This could be after a certain number of inches have been knit or after a repeat has been completed. Once you reach the row where you would like to place your lifeline, string a tapestry needle with a length of quilting thread or cotton yarn, in a contrasting color, that’s longer than the row is wide. Then, run the needle through each stitch on that row. If you’ve placed markers anywhere within that row, be sure to string the yarn around rather than through them, so that they can be removed or slipped back onto the needle once you commence with your knitting. Once the stitches have been threaded onto the lifeline, you can just leave the ends hanging from the sides of your work as you continue with your knitting. Once you reach the end of your project you can then pull these lifelines out since they will no longer be needed.


