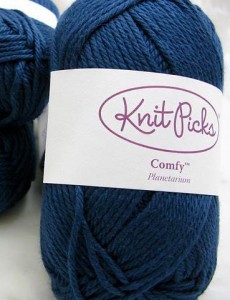
 Today’s dilemma, boys and girls is the never-ending (for me anyway) argument on how to find and pull out the center strand from a center pull skein of yarn.
This is the way I ALWAYS knit from a skein, unless I’m casting on and need both ends. So, each and every time I look for the biggest end, stick my fingers in, wrap them around a bit, stick my other fingers into the other side, wrap them around a bit, try and come up with a few strands that seem looser than the rest and pull. It’s a 50/50 shot as to whether or not it actually works or I end up with a wad. Lately we’re leaning more toward the wads.
Well, I googled it. Turns out, the way I find my center pull is the same way everyone else does it. Seems like there would be an easier way, or something with better odds.
How do you do this? Let me know if you have some secret method for finding this elusive center pull strand!
 It wasn’t that long ago that I shared a post full of
I don’t know if what I do works 100% but it’s the best method I’ve found. I look at the ball of yarn and generally there is one end of the yarn tucked inside the ball (it’s the end that unravels from the outside of the ball). Then I go to the OPPOSITE end and stick my fingers inside and pull out what I hope will be the center. I generally get a small ‘wad’ but it’s simple to unwind & rewind around the outside of the ball. Hope this explanation makes sense!!
I do what Mary Anne does, a little process I’ve begun to call Poke & Pray. I’ve had as much as a fifth of the skein come out in that initial tug, even though I’d found the end of the yarn.
I love that you started this thread – I want to know a better way too!! I get a slight bit of anxiety when it comes time to sit down with a new skein of yarn to start a project because you never know if it will be an easy start, or if you’ll spend the first ten minutes of the project unraveling a wad of yarn…I always wondered why the manufacturers don’t make it easier??
I was just cleaning up my inventory yesterday and noticed on some of the packages, they had an arrow pointing to the end with the beginning of the yarn. Maybe check that out first!
I do the same thing, love the packages with the arrow that tell you to pull a thread on one end, then the other end which is the usable end. I usually only see that with the big skeins of acrylic though.
I wish they would just wrap the “good” end around the outside a couple of times and tuck it under the label. I often wondered about it, and guess it’s the way the machinery is.
Don’t you just hate that? I’ve never been lucky enough to pull just a little out. The alternative…. knitting from the outside and cursing every time you need to pull some more wool!! Perhaps searching in the middle of the ball may make us spend a few moments in solidarity with other knitters doing the same thing.
I take the paper band off first and then puff the skein into a ball before I root around for the centre yarn. It seems to give the end more room to be found. Then I squish it back into a skein and put the paper band back on.
pray and be able to keep calm works for me and then if I have to work with a mess I can drink my tea and get ‘er done.
I can remember when…..the skein had both ends, inside and outside, tucked into the ball band. Ahhh, the good old days. Now I look for both ends, if I find only 1 then I take a deep breathe and stick my fingers in to one end and pray and pull.
Here’s what I learned from another knitter – if the printing on the label is
written horizontally, the end you need to pull out will come from the right. If
the label reads vertically the end will come from the bottom of the skein.
You still need to do the ‘Poke and Pray’ (I like it, KittenWithAWhiplash) but you don’t usually get as much ‘yarn vomit’.
All very well until you get the skein with writing going both ways!
I really appreciate your confession. I’m much relieved that there is not something obvious that I hadn’t figured out. I thought I was the only one practicing yarn gynecology.
Gee, and I thought it was just me….
This is so frustrating! I think the yarn companies need to come up with something better to keep that end easier to find! I usually come up with a big clump of yarn and hope the end is in there!
I do exactly what MaryAnne does. I look where the final end is tucked into and then know that the beginning “end” is going to be on the opposite side. Now it’s a matter of hunting.