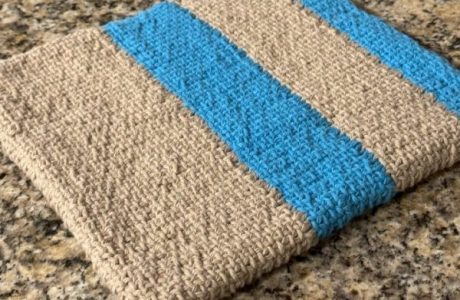
 If you’re new to knitting you might find deciphering the code of knitting to be a little troublesome, so here are some tips for how to follow a knitting pattern. This photo is from my Fisherman’s Rib Scarf Knitting Pattern if you want to follow along.
Knitting Pattern Basics
First you will generally find some important information in the pattern before you get to the instructions. The top of a knitting pattern typically includes the following information:
- Size: finished size of the project or sizes available if the project can be worked in more than one size
- Materials: what kind of yarn was used and how much, as well as what size and type of needles were used or any other required notions like stitch markers or holders
- Gauge: probably the most important thing when knitting a garment or something you want to come out the right size, how many stitches per 4 inches the designer got in the stitch mentioned (usually Stockinette but may be something else if a different stitch is used in the pattern)
Some patterns will list a skill level or describe the skills needed to complete the pattern, but really any pattern can be completed by any knitter with enough time and patience, so skill levels aren’t always that useful.
Knitting Terms and Abbreviations
Once you’ve gotten yarn and needles for your project and checked that you can get gauge (with the needles called for or otherwise) you’re ready to dive into the pattern.
And by “dive in” I mean read. It’s always a good idea to read through a pattern before you start knitting to make sure it’s clear what you need to do. Sometimes patterns will ask you to do two things at once, such as working a pattern repeat and doing increase or decreases, so it’s handy to know that ahead of time.
The biggest potential problem knitters have with how to read a knitting pattern comes from the abbreviations used. In order to save space in knitting books and magazines, a shorthand of knitting terms has been developed that is often also used on knitting websites or in digital patterns.
Many of the abbreviations make sense if you know knitting terms — k is knit, p is purl, k2tog is knit 2 together — but if you’re new to a technique or the pattern uses unfamiliar terms it can make it hard to decipher.
The good news is that most patterns that use abbreviations have a key so you can translate the shorthand into what the pattern actually wants you to do. You can also find guides to knitting abbreviations or search for unfamiliar terms online or in a knitting reference book if you’re still having trouble.
Pattern Punctuation
Another important thing to know when it comes to how to follow a knitting pattern is that sometimes punctuation is used for important purposes.
If the pattern has multiple sizes you will often see different numbers in parentheses, for example cast on 10 (12, 14) stitches. If you’re working the smallest size you would cast on 10; for the largest, cast on 14. If there are a lot of sizes you might see a group of numbers in parentheses, another in brackets, maybe a third in wavy brackets. The only number you need to pay attention to is the one for your size.
You will often see asterisks in patterns to indicate a section that is repeated. For example k2, *p2, k2. Repeat from * across would mean you would knit 2 at the beginning of the row, then repeat purl 2, knit 2 across and end with a knit 2.
Sometimes there will be instructions in a set of asterisks if only a portion of the row’s instructions are repeated. Or you might have a portion of the instructions in parentheses like k2 (p2, k2) three times, p2. This would mean you knit 2 at the beginning, then purl 2, knit 2, three times, then purl 2 at the end.
How to Follow a Knitting Pattern
Once you have read through the pattern and understand everything you need to do, now it’s time to start knitting. There are lots of ways you can keep track of where you are in a pattern depending on its complexity.
The main thing you might need to keep track of is instructions for the particular size of a project you are making. Highlight, underline or circle the numbers that apply to you so you don’t have to remember which numbers apply to you as you knit.
You may not need to do more than keep track of how long your knitted piece is or count rows (which you can do with a purchased row counter, an app, hashmarks on paper or just by counting rows on your project). You can also use locking stitch markers placed as you knit to make it easier to count rows when you need to do something in your project at intervals.
If the instructions are different from row to row you might want to mark completed rows with a checkmark or x (don’t mark through the instructions in case you need to rip back or want to make the project again). If you’re working from a chart, highlighting finished rows can make it easier to see where you are while not obscuring where you’ve been.
As you knit more you will work out a system that works for you to keep track of where you are so you can following a knitting pattern with confidence.


