• Home
  • Suggest A Craft
  • DIY Newsletter

Knitting

Patterns, projects and techniques

  • About CraftGossip
  • Our Network
    • Bath & Body Crafts
    • Candle Making Ideas
    • Crochet Ideas
    • Cross Stitch
    • Edible Crafts
    • Felting Patterns
    • Glass Art
    • Home & Garden Ideas
    • Indie Crafts
    • Jewelry Making
    • Kids Crafts
    • Knitting Patterns
    • Lesson Plans
    • Needlework
    • Party Ideas
    • Polymer Clay
    • Quilting Ideas
    • Recycled Crafts
    • Scrapbooking
    • Sewing Patterns
    • Card Making
    • DIY Weddings
    • Not Craft Ideas
  • Giveaways
  • Roundups
  • Store
  • Search

Free Seed Stitch Hat Knitting Pattern

December 29, 2018 by Larissa Coleman

Seed stitch is one of those patterns that people either love or hate. I really like the texture of it and find it fun to knit.

Most Seed Stitch hat patterns include ribbing at the bottom, but this one from Margo Knits is all over Seed Stitch, with the bottom part a little tighter than the rest thanks to using two different-sized knitting needles.

Head over to the blog for the full instructions.

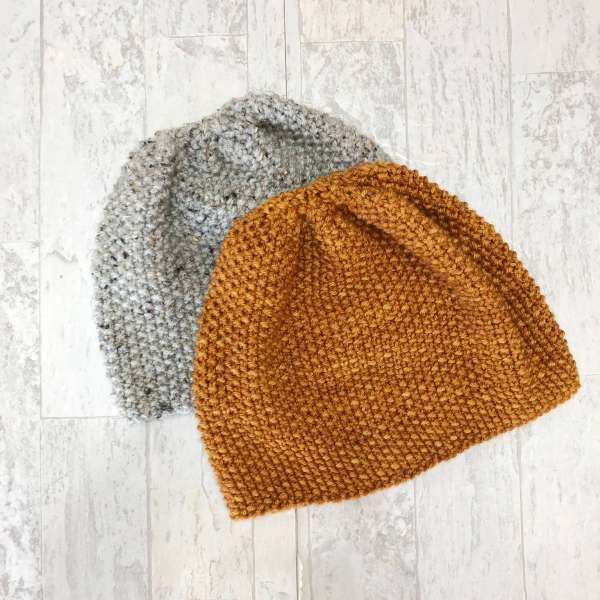
[Photo: Margo Knits.]

SEED STITCH HAT

Yarn: Lion Brand Vanna’s Choice

Colorway: Grey Marble Heather

Yardage: Approx. 150yards

Gauge: 16 & 16 rows = 4”


Needles:

US Size 6 (4.0mm) 16 inch circular needles

US Size 8 (5.0mm) 16 inch circular needles

5 US Size 8 (5.0mm) double pointed needles

Stitch Marker

Yarn needle

Abbreviations:

CO : Cast on

K : Knit

P : Purl

K2tog: Knit 2 stitches together

P2tog: Purl 2 stitches together

Pm : Place marker


Seed Stitch Pattern:

Round 1: K1, P1

Round 2: P1, K1


Pattern Directions:

With Size 6 circular needles, CO:  71 sts, pm, join in the round. (If you want to make this hat for a child size, make a gauge swatch of the stitch pattern to calculate the number of stitches. Stitches must be an odd number for the seed stitch pattern.)

Work in seed stitch pattern until brim measures 2?

Switch to size 8 needles and work in seed stitch pattern until hat measures 7 inches (17.75cm – 19cm) or desired height

Ending with a round 1, on the last round before you begin the decrease rounds, continue in seed stitch pattern until 2 stitches remain. Then purl the last 2 stitches together.

Decrease Rounds:

***Switch to double pointed needles when stitches become difficult to knit on circular needles.***

Decrease round 1: *K2tog, P2tog, rep. From * to end of round

Decrease round 2: *P1, K1, rep from * to end of round

Decrease round 3: *K2tog, P2tog, rep from * until last st, K last st. to end of round

Decrease round 4: *K1, P1, rep from * to end of round


Cut yarn and weave end through remaining loops. Pull tight to secure and weave in ends.

Next Pattern:

  • Seed Stitch vs. Moss Stitch and How to Tell the Difference
  • Knitting Pattern - Seed Rib Hat
  • Seed Stitch Knitting Patterns
«
»

Have you read?

Knit a Linen Stitch Hot Pad

Linen stitch is one of my favorite knitting stitch patterns that, every time I use it in a project, I think about how I don’t use it often enough. 

It’s an easy stitch to make, with slip stitches done with the yarn held to the front of the work on the right/front side and to the back on the wrong/back side, which makes the strand of yarn a visible part of the pattern. 

It also makes a fabric that is thick and looks kind of like a woven fabric.

I recently used linen stitch to make a double-thick pot holder, which I worked in a kind of interesting way. I didn’t want to have to do any sewing on the project, so I started it from a crochet cast on and picked up stitches from the side of the cast on to make the hot pad all in one piece in the round with the edge sealed. 

This requires working on two circular needles, which is another technique I don’t use that often and am always reminded how much I like it when I do. 

The combination of double thickness and the stitch pattern makes for a hot pad that’s already pretty thick, but I also added a bit of old towel to the inside before I closed up the end to make it super thick and extra protective for your surfaces. 

I found the engineering challenge of this construction method to be a lot of fun, but you could also just knit it as a tube (casting on twice as many stitches as I did) and sew up the ends by hand when the knitting is done. Either way you’ve got a useful and pretty addition to your kitchen, whether you work it in a solid color, stripes or as a stash busting project will all your cotton odd balls. 

You can grab the pattern over at Our Daily Craft, or check it out on Ravelry. 

40+ Hot Pads You Can Sew For The Kitchen [Sewing]

A Cozy Knit to Calm Your Mind

Double Knit an Infinity Scarf

Categories

baby hat Baby Patterns Beginner Book Reviews cardigan Christmas CraftGossip Giveaways Craft News and Events Free Kntting Patterns Giveaways! Hats Knitting Articles Of Interest Knitting Patterns Knitting Technique & Ideas mittens Quick scarf shawl patterns socks Sweaters

RSS More Articles

  • Etsy Spotlight – Sew the Dress of Your Dreams with This Romantic Puff Sleeve Pattern
  • Vacation Pocket Mini Album Project
  • DIY Soda Bottle Cloches – A Clever Way to Shield Your Seedlings
  • Crochet Pattern Review: Aura Pullover
  • Scrappy Pineapple Block – Quilt Pattern
  • Learning about the Moon for Kids
  • Free Crochet Pattern – Battenberg Blanket
  • Book Review – Big Thrift Energy
  • How to Make a Summer Drinks Shaker Card
  • Cookie Monster Toddler Apron

Copyright © 2025 · CraftGossip | Start Here | Contact Us | Link to Us | Your Editors | Privacy and affiliate policy