• Home
  • Suggest A DIY
  • DIY Newsletter

Knitting

Free Patterns, Tutorials and Project Ideas

  • About CraftGossip
  • Our Network
    • Bath & Body Crafts
    • Candle Making Ideas
    • Crochet Ideas
    • Cross Stitch
    • Edible Crafts
    • Felting Patterns
    • Glass Art
    • Home & Garden Ideas
    • Indie Crafts
    • Jewelry Making
    • Kids Crafts
    • Knitting Patterns
    • Lesson Plans
    • Needlework
    • Party Ideas
    • Polymer Clay
    • Quilting Ideas
    • Recycled Crafts
    • Scrapbooking
    • Sewing Patterns
    • Card Making
    • DIY Weddings
    • Not Craft Ideas
  • Giveaways
  • Roundups
  • Store
  • Search

Giveaway: Beaded Lace Knitting

July 6, 2015 by Sarah White

beaded lace knitting

And the winner is Karey!

Lace knitting is a lot of fun on its own, and adding beads to knitting brings a bit of sparkle that doesn’t have to add a lot of work.

But when you combine lace and beads in a knitting project, you can come up with something really special, better than either one on its own.

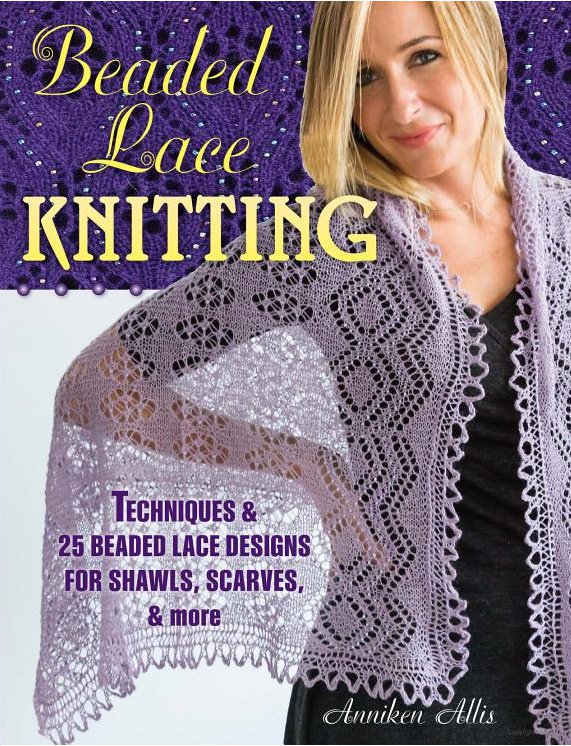
That’s the concept behind Anniken Allis’ book Beaded Lace Knitting, which includes tips on how to knit lace and how to add beads to a project (she uses the crochet hook method to add beads as you knit). The book includes 25 patterns for knitters of various skill levels, which are arranged by skill level in the book, so if you’re new to this kind of knitting you can start at the beginning.

There are lots of shawls in this collection, as you would expect, but there are also patterns for a poncho, a cape, cowls, vests and a cardigan (which is actually one of my favorites). Beads and lace add luxury to these projects, sometimes without a lot of fuss, and sometimes producing a truly special occasion garment.

If you’d like a chance to win a copy of this book (US residents only, please!) comment on this post by the end of the day Sunday, July 12. I’d love to know about your experience with either lace, beaded knitting or both. I have done both techniques separately but I don’t think I’ve ever tried them together.

Thanks for visiting, commenting and sharing, and good luck!

Looking for more knitting patterns for knitted Cardigans? Check out these Knitting patterns we found on Etsy.

Specific to knitters, you can join our Knitting Patterns Only group to get, well, knitting patterns, ask questions and gain inspiration for what to knit next.

Looking for Yarn online? Check out Lionbrand our preferred source for purchasing yarn online.

Next Pattern:

  • Twisted Lace Headband Knitting Pattern
  • Lace Cowl Knitting Pattern
  • Leaf Lace Cardigan Knitting Pattern
«
»

Comments

  1. maureen says

    July 6, 2015 at 12:07 pm

    I have yet to knit with beads. I have done a few lace shawl items I have made as gifts and have so enjoyed them.

  2. CinLin says

    July 6, 2015 at 12:13 pm

    love to add beads to my lace knitting! I use a tiny crochet hook to attach the beads

  3. scapela says

    July 6, 2015 at 12:13 pm

    i have never tried lace knitting – i have admired it for a long time and would love to try.

  4. Kathleen K says

    July 6, 2015 at 12:17 pm

    like to learn this

  5. Amanda says

    July 6, 2015 at 12:33 pm

    I have knit some lace projects, but never with beads. I’ve wanted to for a while but didn’t know where to start. I think this book would be great! 🙂

    Thank you for the giveaway.

  6. Denise says

    July 6, 2015 at 12:39 pm

    I have done some simple beaded knitting but I am ready for an upgrade!!

  7. joyce says

    July 6, 2015 at 12:45 pm

    I have done several lace projects but only one small project with beads. I would love to do a larger project with beads and try new ways to add them to a project.

  8. Cindy S says

    July 6, 2015 at 12:55 pm

    I knit a lace shawl, my very first shawl and added beads with a crochet hook as I went. It’s very pretty but I’ve yet to wear it any place.

  9. Charlene Anderson says

    July 6, 2015 at 1:05 pm

    Beads can make any knitting special!

  10. Wanda Newton says

    July 6, 2015 at 1:12 pm

    I dabble in knitting since my retirement: however, I have never used beads when knitting. Knitted pieces with beads would be adorable. The book looks like a valuable resource for learning the process. Thanks for an opportunity to win the book.

  11. Fonda Rush says

    July 6, 2015 at 1:33 pm

    I haven’t learned how to knit with beads — yet! That would be fun to learn! Thank you for the opportunity to win!

  12. Peggy R says

    July 6, 2015 at 1:50 pm

    I love making shawls for the special people in my life, but have only crocheted with beads. This book would be perfect, because I would love to incorporate beads into my knitting!! In fact, I purchased beads already to get started, but have no patterns to help me, or to give me ideas. Thank you for the wonderful giveaway!!

  13. Emily Carter says

    July 6, 2015 at 3:34 pm

    I haven’t tried either of these – but would love too!

  14. Karey says

    July 6, 2015 at 3:59 pm

    I’ve not tried knitting or crocheting with beads yet. It’s on my to-do list because I really love the look of yarn with beads!

  15. Debi says

    July 6, 2015 at 7:32 pm

    love lace knitting – wrote 2 patterns .. but do not know how to add beads.. would be fun to learn … as I spin my own yarns :0)

  16. Jeane Howell says

    July 6, 2015 at 8:22 pm

    I have been afraid to try either knitting with beads or knitting lace stitches. This would certainly encourage me to try. Thank you for having the drawing.

  17. MelodyJ says

    July 6, 2015 at 8:32 pm

    I’ve haven’t done lace or beaded knitting yet.

  18. Jane S. says

    July 6, 2015 at 8:56 pm

    I have done the kind of knitting with beads where the bead sits between two stitches, but so far have never knitted a bead directly into a stitch! It looks so pretty though that I really do want to learn how to do it. This looks like a wonderful book, thank you for the chance to win it! 🙂

  19. Ronnie G says

    July 6, 2015 at 9:00 pm

    well I too knit, and bead… but separately. I would love to try them together. Thanks for the beautiful give-aways!

  20. Bill G. says

    July 6, 2015 at 9:24 pm

    I have always loved the touch beads give crochet scarves. However I have never used them with my knitting. I am thinking if this is done with a crochet hook method how nice some of the pieces I have in my UFO area making for my wife would be with beads added. Thank you

  21. Patricia Casper says

    July 6, 2015 at 9:25 pm

    I have used beaded yarn and very pleased with the results. Would love to use my own creations with beads I choose. I do this in a limited fashion but lace and beads are WOW!!

  22. Maureen says

    July 6, 2015 at 10:01 pm

    i would love to learn how to bead knit lace. I do bead knitting, using a glide flosser to add the beads but have never done it with a hook.
    Thanks for the giveaway!

  23. Mari Saxhaug says

    July 6, 2015 at 10:18 pm

    Making shawls and adding beads are 2 things on my bucket list!! Beautiful.

  24. rrjane011749 says

    July 6, 2015 at 11:10 pm

    I haven’t tried either, but would love to give them a try!

  25. cwknitnut says

    July 7, 2015 at 12:12 am

    I love beaded lace knitting! Especially since I learned how to add beads as I knit instead of pre-stringing.

  26. Heidi Kirsch says

    July 7, 2015 at 4:59 am

    I’ve done them both together but I thought I knew everything. I had great difficulty getting beads on and I must have placed them wrong because you really couldn’t see them from the front. It was beautiful none the less.

  27. Susan Spiers says

    July 7, 2015 at 8:48 am

    I crocheted a lace afghan for my nephew’s wedding gift and added small beads into the trim in their colors – first try for me and they loved it!

  28. Nina says

    July 7, 2015 at 8:59 am

    I looooove lace but have only tried beads a couple of times– this seems like a great way to get more comfortable!

  29. CraftyLinda says

    July 7, 2015 at 10:16 am

    I love to do lace it is something you really get into. I have never tried adding beads to my lace. I have thought about it a lot but just never got around to it. This would give me the incentive to try now. Thanks for making it possible.

  30. knittingdancer says

    July 7, 2015 at 10:25 am

    My favorite things to knit are beaded lace shawls. This book would be a great addition to my library. I used the dental floss method to add my beads.

  31. jpusel says

    July 7, 2015 at 5:48 pm

    I’ve done some simple beading and some simple lace patterns; but my only shawl, so far, was stockinette stitch with the sequins already threaded on the yarn.

  32. Susan Boi says

    July 7, 2015 at 8:16 pm

    I love knitting with beads! Sometimes I prestring the beads and knit them in a design, sometimes I use a crochet hook and knit them in lace. I ask you, is there anything in life that isn’t made more wonderful by a little sparkle?

  33. Jeanne says

    July 7, 2015 at 10:15 pm

    I love knitting lace and add beads whenever I can… They add a little weight and sparkle to special scarves, shawls & sweaters.

  34. Nancy J. Elliott says

    July 7, 2015 at 10:38 pm

    This is a techquiene that I have been meaning to learn. I love making lace shawls.

  35. lostinkansas says

    July 8, 2015 at 2:20 pm

    My favorite project that included beads is a Citron shawl in laceweight silk that I beaded the bindoff. It really helps the shawl to lay nicely. Currently knitting a Dangling Conversation that has a beaded edge. Thanks for the chance to win the book!

  36. SherryG. says

    July 10, 2015 at 10:47 am

    I started knitting lace two years ago with a Craftsy class and loved it so much that I took another class to learn knitting with beads. I love the look of beads in a shawl or scarf.

  37. ceh says

    July 11, 2015 at 4:54 pm

    I’ve crocheted with beads many times, but rarely knit with beads – even then, I add them in usually using the crochet hook versus stringing them onto the yarn.

  38. Alice E Stringham says

    June 20, 2018 at 4:06 pm

    I haven’t knitted with beads yet, but I love the elegant look that they bring to any knitted item.

Have you read?

How To Do Kitchener Stitch: A Beginner-Friendly Guide To Grafting Knitting Seamlessly

Kitchener stitch is one of those knitting techniques that feels a little bit mysterious until you finally sit down and do it. It is often used to close the toes of socks, but it is also a wonderfully neat way to join two sets of live stitches together without making a bulky seam.

If you have ever finished a beautiful sock and then paused at the toe because the pattern says “graft remaining stitches,” this is the tutorial you want to keep handy.

Kitchener stitch, also called grafting, creates a row of stitches between two pieces of knitting so the join looks almost invisible. Instead of binding off and sewing two edges together, you use a tapestry needle and yarn to form a new row of knitting between the live stitches.

It is one of the most useful finishing techniques for knitters, especially if you enjoy knitting socks, mittens, cowls, loop scarves, or garments where a smooth join matters.

You might also like this older CraftGossip post on grafting with Kitchener stitch, and if you want to go deeper into finishing techniques, this post on mastering grafting in knitting is another helpful read.

What Is Kitchener Stitch?

Kitchener stitch is a method of grafting two sets of live stitches together. The stitches stay on two needles, usually held parallel to each other, and you use a threaded tapestry needle to work through the stitches in a specific order.

When done well, the finished join looks like one continuous piece of knitting.

This is why Kitchener stitch is so popular for:

  • sock toes
  • mitten tips
  • shoulder joins
  • cowls
  • loop scarves
  • seamless tube projects
  • underarm stitches on some sweaters
  • small knitted bags and pouches

It is most commonly used on stockinette stitch, but grafting can also be adapted for other stitch patterns once you understand the basic idea.

Why Use Kitchener Stitch Instead Of Sewing A Seam?

The biggest benefit of Kitchener stitch is that it creates a smooth, almost invisible join. That matters most in places where you do not want a bulky seam, such as the toe of a sock.

A sewn seam across a sock toe can feel uncomfortable inside a shoe. Kitchener stitch avoids that by creating a flat, flexible finish.

It also gives knitted items a more polished look. If you are making gifts, charity knits, socks, or heirloom-style projects, learning this one technique can make your finished pieces look much neater.

For knitters who enjoy socks, you may also like this roundup of knitting patterns using sock yarn, especially if you have leftover yarn after finishing a pair.

Supplies You Need

To work Kitchener stitch, you will need:

  • two knitting needles holding live stitches
  • a tapestry needle or darning needle
  • yarn tail or matching yarn
  • scissors
  • good lighting
  • a little patience the first time

If you are working sock toes, most patterns will tell you how many stitches to leave on each needle before grafting.

As a general guide, leave a yarn tail at least three times the width of the stitches you are grafting. If you are unsure, leave a little extra. It is much easier to weave in a longer tail than to run out halfway across.

A blunt-tip tapestry needle is easier to control than a sharp sewing needle because it slides between yarn strands without splitting them as much. You can find tapestry needles, sock knitting tools, stitch markers, and finishing supplies through places such as Amazon, Mary Maxim, or your favorite local yarn store.

Before You Start: Set Up Your Stitches

For standard Kitchener stitch on stockinette:

Hold the two needles parallel, with the wrong sides of the knitting facing each other.

The right side of the knitting should be facing out.

The needle closest to you is the front needle.

The needle farther away from you is the back needle.

Thread your yarn tail onto a tapestry needle.

Try to keep the stitches sitting neatly on the needles and avoid twisting them before you begin.

The Kitchener Stitch Mantra

Many knitters remember Kitchener stitch with this little rhythm:

Front needle: knit off, purl on.
Back needle: purl off, knit on.

That means:

On the front needle, go into the first stitch knitwise and take it off. Then go into the next stitch purlwise and leave it on.

On the back needle, go into the first stitch purlwise and take it off. Then go into the next stitch knitwise and leave it on.

Once you get into the rhythm, it becomes much less intimidating.

Kitchener Stitch Step-By-Step

Setup Step 1

Insert the tapestry needle into the first stitch on the front needle as if to purl.

Pull the yarn through.

Leave the stitch on the knitting needle.

Setup Step 2

Insert the tapestry needle into the first stitch on the back needle as if to knit.

Pull the yarn through.

Leave the stitch on the knitting needle.

Now you are ready to begin the repeating sequence.

Step 1: Front Needle, Knitwise, Off

Insert the tapestry needle into the first stitch on the front needle as if to knit.

Pull the yarn through.

Slip that stitch off the knitting needle.

Step 2: Front Needle, Purlwise, On

Insert the tapestry needle into the next stitch on the front needle as if to purl.

Pull the yarn through.

Leave that stitch on the knitting needle.

Step 3: Back Needle, Purlwise, Off

Insert the tapestry needle into the first stitch on the back needle as if to purl.

Pull the yarn through.

Slip that stitch off the knitting needle.

Step 4: Back Needle, Knitwise, On

Insert the tapestry needle into the next stitch on the back needle as if to knit.

Pull the yarn through.

Leave that stitch on the knitting needle.

Repeat these four steps until all stitches have been grafted.

A Simple Way To Remember It

Say this out loud as you work:

Knit off, purl on.
Purl off, knit on.

It feels silly the first few times, but it works. Many knitters mutter this little phrase while closing sock toes, and honestly, anything that helps you avoid losing your place is worth doing.

How Tight Should Kitchener Stitch Be?

One of the most common mistakes with Kitchener stitch is pulling the yarn too tightly.

You are not sewing a seam closed. You are creating a new row of knitting.

After every few stitches, gently adjust the tension so the grafted row matches the surrounding stitches. If you pull too tightly, the join may pucker. If you leave it too loose, the grafted row may look stretched out.

A good trick is to look at the stitches beside the graft and try to match their size.

Do not panic if it looks a little uneven while it is still on the needles. Kitchener stitch often looks better once everything is off the needles and the tension has been gently adjusted.

How To Finish The Last Stitches

When you get to the final stitches, continue the sequence as closely as possible.

If there is only one stitch left on a needle, work the “off” part of the sequence for that stitch.

Pull the yarn through gently and then weave the tail into the inside or wrong side of the project.

For socks, weave the end into the inside of the toe so it will not be visible.

Troubleshooting Kitchener Stitch

My graft looks too tight

You probably pulled the yarn too firmly as you worked. Use the tip of your tapestry needle to gently loosen each grafted stitch, working from one side to the other.

My graft looks loose

Gently snug up the grafted stitches one at a time. Do not yank the working yarn all at once, as this can make one area tight and another loose.

I lost my place

Pause and look at the stitches. If the last stitch was removed from the front needle, you are probably ready to work the “purl on” part on the front needle or move to the back needle. If you are a beginner, it helps to say the mantra out loud every single time.

I split the yarn

A blunt tapestry needle helps prevent splitting. If a stitch looks split and messy, carefully undo that part before continuing.

The join looks like a seam, not a row of knitting

This usually means the tension is too tight or the needle was inserted in the wrong direction on some stitches. Practice on a swatch before using Kitchener stitch on a special project.

Practice Before Grafting A Real Project

If Kitchener stitch makes you nervous, knit two small stockinette swatches and place the live stitches on two needles. Use a contrasting yarn to practice grafting across the stitches.

Practicing with a different color makes it easier to see what the grafted row is doing. Once you understand the movement, try again with matching yarn.

This is especially useful before grafting handmade socks, because sock toes are small and can feel fiddly the first few times.

When Else Can You Use Kitchener Stitch?

Kitchener stitch is most famous for sock toes, but it is helpful in many other knitting projects.

Use it for joining the ends of a cowl or loop scarf, especially when you start with a provisional cast on. This CraftGossip post on making loop scarves from stash yarn mentions using a provisional cast on so the ends can be grafted together neatly.

You can also use Kitchener stitch for small bags, seamless headbands, mitten tips, and some garment joins.

If you are brushing up on knitting basics, this post on favorite ways to cast on is a good companion read, especially if you are learning how different beginnings and endings affect the finish of a project.

Kitchener Stitch For Sock Knitters

If you knit socks from the cuff down, Kitchener stitch is one of the most useful finishing techniques you can learn.

Most cuff-down sock patterns end with a small number of stitches divided between two needles. Kitchener stitch closes those stitches without creating a ridge across the toe.

For a comfortable sock toe:

Keep the stitches evenly divided.

Do not pull the graft too tightly.

Check that the toe lies flat before weaving in the end.

Use matching yarn whenever possible.

Once the sock is finished, blocking can also help smooth the stitches and even out the graft.

If you enjoy knitting small accessories, you might also like these easy headband knitting patterns, which are great projects for practicing finishing techniques on something smaller than a sweater.

Kitchener stitch has a reputation for being tricky, but it is really just a short sequence repeated across two needles. Once you remember the rhythm — knit off, purl on, purl off, knit on — it becomes much easier.

The real secret is to slow down, keep your tension relaxed, and remember that you are creating a row of knitting, not stitching a seam shut.

It may not feel natural the first time, but after a few sock toes or practice swatches, Kitchener stitch becomes one of those finishing skills you will be glad to have in your knitting toolkit.

Categories

baby hat Baby Patterns Beginner Book Reviews cardigan Christmas CraftGossip Giveaways Craft News and Events Free Knitting Patterns Giveaways! Hats Knitting Articles Of Interest Knitting Patterns Knitting Technique & Ideas mittens Quick scarf shawl patterns socks Sweaters

Featured Posts

Have You Knit Your Christmas Sweater Yet?

knit an elf for last-minute decor or gift giving

One More Quick Little Holiday Pattern

outlander cowl knitting pattern

The Perfect Knit for Outlander Fans, and Everyone Else

101 stitches win

Day 7 Winner

Books For Knitters, Both Young, And Well, Younger!

RSS More Articles

  • Cross Stitch Ice Cream and Frozen Treats
  • 15 Charity Sewing Projects That Let You Sew Something Useful For A Good Cause
  • Sunflower Ribbon Embroidery Tutorials and Kits to Brighten Your Hoop
  • Decorating Mistakes That Make Your Living Room Feel Cluttered
  • Remembering Jill Smokler, Founder Of Scary Mommy
  • In the Garden Layer Cake – A Bloom-Filled Fabric Collection for Spring Sewing
  • How To Do Kitchener Stitch: A Beginner-Friendly Guide To Grafting Knitting Seamlessly
  • Pattern Review: Georgie Granny Square Bucket Hat Crochet Pattern
  • 12 Handmade Patriotic 4th of July Card Ideas
  • Shark Week Learning for Kids

Pick Your Blog

  • Sewing
  • Knitting
  • Quilting
  • Crochet
  • Home & Garden
  • Recycled Crafts
  • Scrapbooking
  • Card Making
  • Polymer Clay
  • Cross-Stitch
  • Edible Crafts
  • Felting
  • Glass Art
  • Indie Crafts
  • Kids Crafts
  • Jewelry Making
  • Lesson Plans
  • Needlework
  • Bath & Body
  • Party Ideas
  • Candle Making
  • DIY Weddings
  • Not Craft
  • Free Craft Projects

Copyright © 2026 · CraftGossip | Start Here | Contact Us | Link to Us | Your Editors | Privacy and affiliate policy